CORRECTION: In-class exam is on Wednesday, January 16th as Tuesday the 15th is a late-start. The exam will begin at 9:10 and end at 10:20 AM. Please arrive promptly after the bell.
Author: photoahn
Welcome to Grade 11/12 Photography at Laurier!
Grade 11/12 Photography Exam Review
- Know Elements and Principles of Art and be able to recognize them in a photo.
- Know the basics of using a camera: exposure triangle (f stop, aperture, ISO), depth of field etc.
- Describe the types of composition rules in photography (framing, rule of thirds, etc) and be able to identify different angles (bird’s eye, bug’s eye and subject’s eye level)
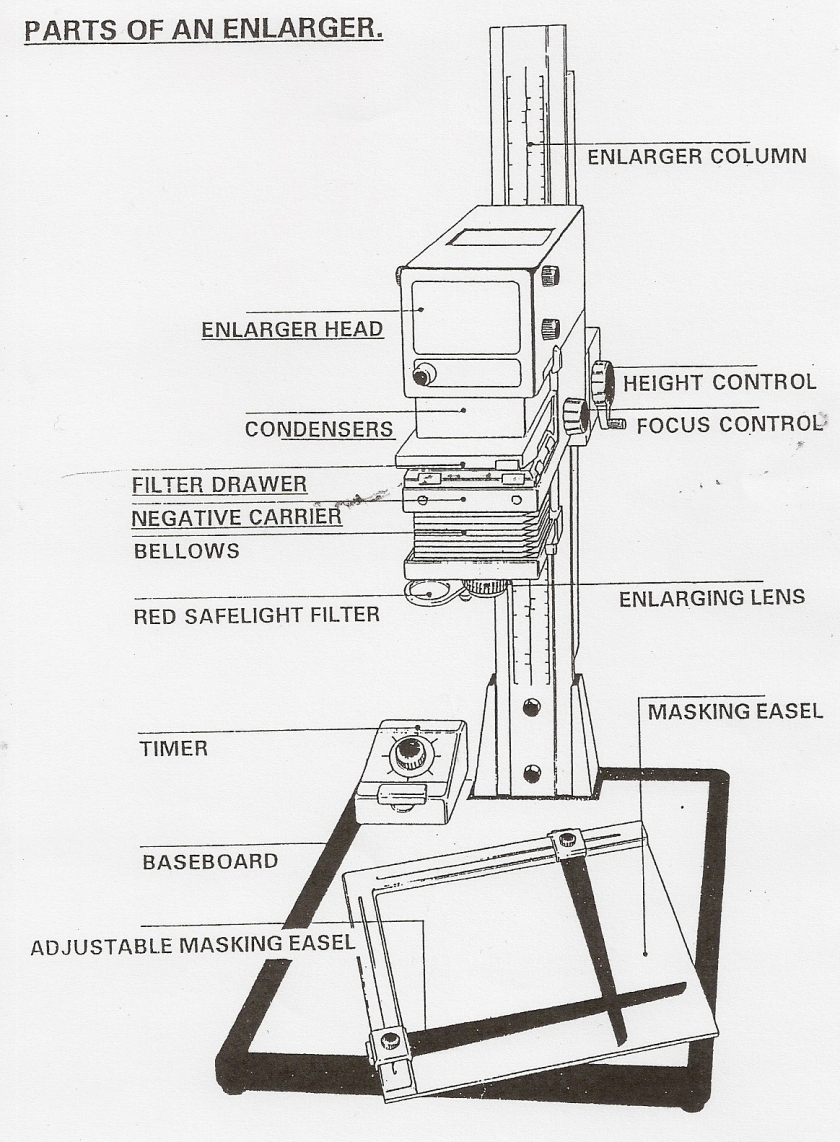
- Review film and photo chemical development, Know darkroom and film developing procedures (chemical order, agitate, water wash, test strip, contact sheet, enlarger, purple stop bath means chemical exhaustion, developer makes the latent image visible, stop bath stops the development, fixer makes the image permanent)
- Review the steps on how to load film in camera and developing tank
- Troubleshoot film and photo development problems that can happen and how to correct them, such as over and under exposed film, over and under exposed print
- Be familiar with the works by the photographers from your presentations (Edward Weston, Imogen Cunningham, Olivia Parker, Davide Luciano, David Lachapelle, Barassai, Gunner Stahl, Dorothea Lange, Diane Arbus, Walter Looss, Zun Lee, Ansel Adams, Jerry Uelsmann)
- Review 13 types of photography. Be able to discuss style, technique, or theme, and give critique (describe, analyze, interpret, judge).
- Know the History of Photography
- Know and be able to identify different types of photos (portraiture, silhouette, great vs depth of field, stopped vs blurred action etc)
- Know the Photoshop tools and techniques (including working using 300ppi and always saving as a jpeg/jpg to ensure printability)
- Know and be able to identify different types of portraits (posed vs candid, studio vs natural lighting, etc).
- Review and be able to label parts of DSLR, DSLR LCD screen, SLR, and Enlarger
- Understand the lens focal length and different types of lenses and their advantages
- Know darkroom health and safety
- Review using the DSLR “Beyond Auto” (M, AV, TV and P Modes, ISO, parts, auto vs manual focus); Know how and when to set the shutter speed (TV, to capture slow and fast action) vs. aperture (AV, to capture great and limited depth of field)
- Review using the SLR (light metre *green dot, +, – , ISO, f stop, shutter speed)
Grade 12
- Know the parts of the SLR and DSLR cameras and know the difference
- Be able to compare manual versus digital photography.

Canon EF-S 18-55mm f/3.5-5.6 IS II
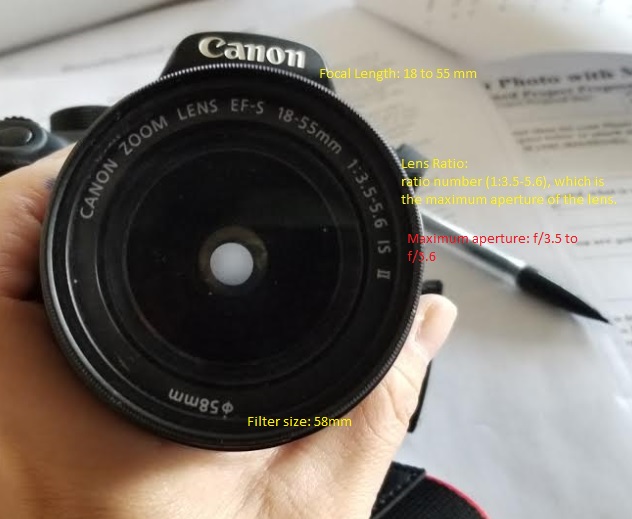
Understanding Focal Length
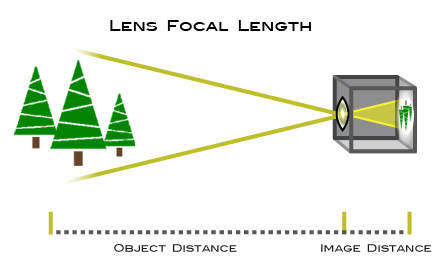
A lens’ focal length is defined as the distance between the lens’ optical center and the camera’s image sensor (or film plane) when focused at infinity. It is not a measurement of the actual length of a lens, but a calculation of an optical distance from the point where light rays converge to form a sharp image of an object to the digital sensor.
The focal length tells us the angle of view—how much of the scene will be captured—and the magnification—how large individual elements will be. The longer the focal length, the narrower the angle of view and the higher the magnification. The shorter the focal length, the wider the angle of view and the lower the magnification.
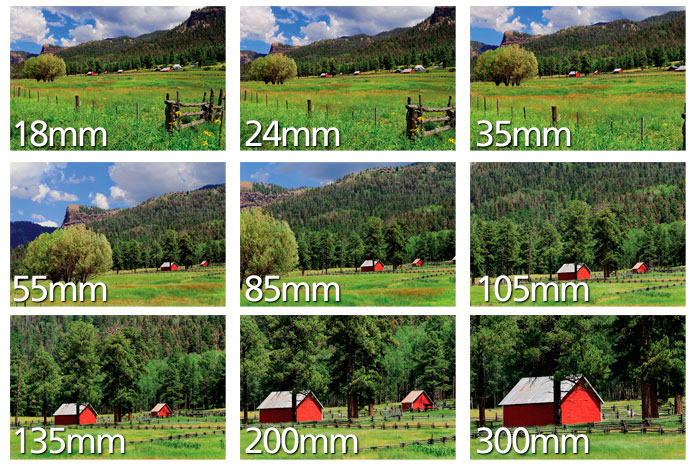
In short, the focal length of the lens is the measure of how “zoomed in” your lens is. At 16mm, the lens is very “zoomed out” or wide. At 200mm, the lens is very “zoomed in” ortelephoto. But beyond the reach of the lens, different focal lengths also have different feels.

Two Types of Lenses
- Prime lenses have a fixed focal length
- Zoom lenses have variable focal length
Advantages of zoom lenses:
- Good for photographing a variety of subjects such as landscapes and portraits, and you just want one lens for both situations.
- It also reduces the number of times you need to change the lens which saves time and limits the possibility of getting dust in the camera’s mirror box or on the sensor
Advantage of prime lenses:
- Lightweight and compact
- Tend to have larger maximum aperture (f/1.4 to f/2.8), which is an advantage when shooting in low light conditions as it will increase the possibility of hand holding the camera and freezing the subject without shake or blur caused by the longer exposures.
- large apertures also means you can get a shallow depth of field which is useful for portraiture where you might want a softer or blurred background (also known as bokeh).
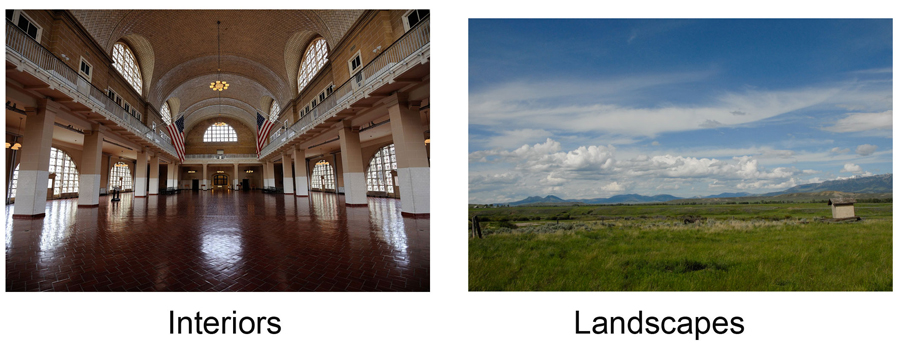
WIDE ANGLE LENS
© Diane Berkenfeld & Lindsay Silverman
Wide-angle Lens has a shorter focal length when compared to a standard lens. This enables you to capture a comparatively wider angle of view. A wide-angle lens is a natural choice for capturing outdoor landscapes, interiors, large group photos.
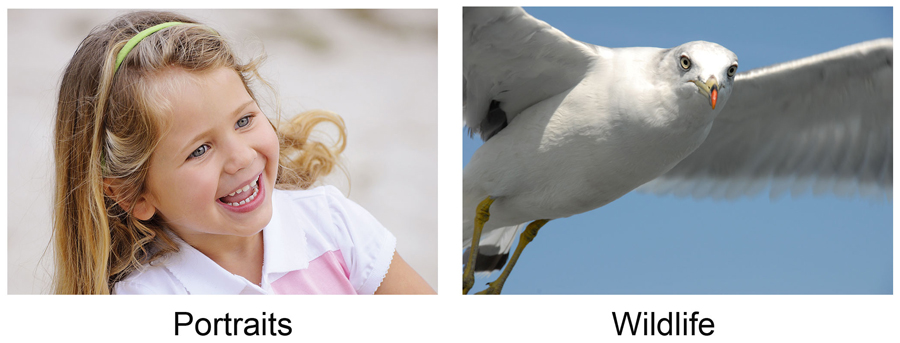
STANDARD LENS

© Lindsay Silverman
Standard Lens are popular as they are closest to the angle of view we humans see. These lenses have minimal distortion, which can be flattering to the subject. They tend to use large apertures and allow a lot of light to enter the lens which makes them fast in low light conditions. The large apertures (f/1.8 – f/1.4) also produce a pleasing out-of-focus effect to the background which concentrates the attention of the viewer on the subject. Standard lenses are the popular choice for a wide range of photography including portraiture, nature and low light situations where the photographer can not use a flash or is looking to capture the scene with available light.
TELEPHOTO LENS
© Diane Berkenfeld & Mike Corrado
Telephoto Lens are very popular for portraiture and product photography as well as nature and wildlife imagery. They allow the photographer to produce close crops on the subject. In the case of portraiture a telephoto allows the photographer to take the photo at a distance that does not intrude upon the subject.
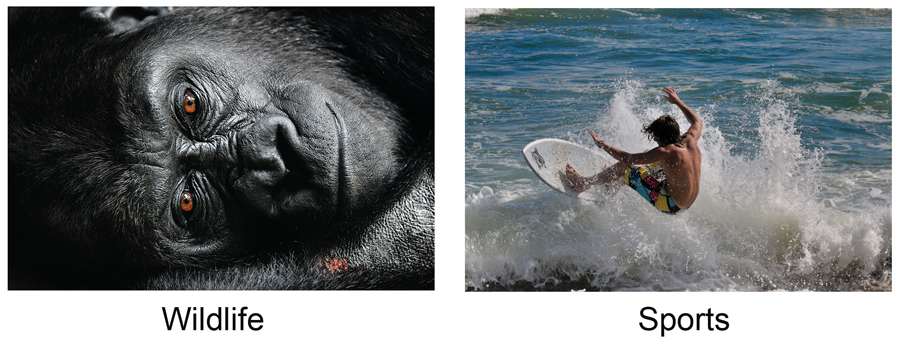
SUPER TELEPHOTO LENS
© Lindsay Silverman & Mike Corrado
Super Telephoto Lens provide a good range for sports and wildlife photography where the photographer is limited as to how close they can get to the subject.
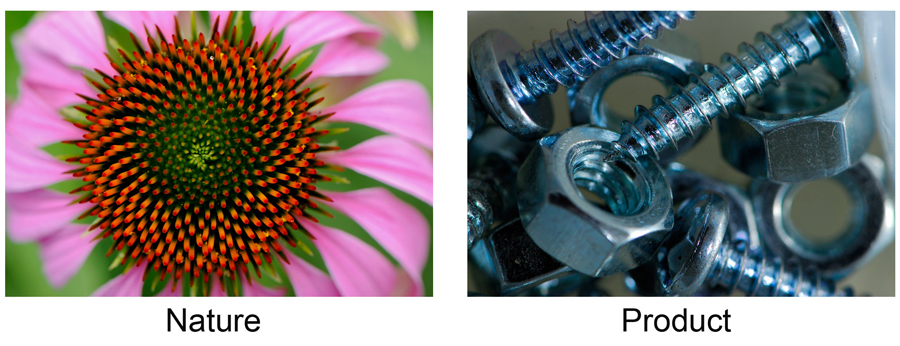
MACRO LENS
© Lindsay Silverman
Macro Lens allow the photographer to focus very close to the subject and reproduce them at a 1:1 life-size ratio on film or an imaging sensor. These lenses are popular for subjects such as flowers, insects and small products.
Resources:
Photographer Handout
Photoshop Challenge

Photoshop Challenge
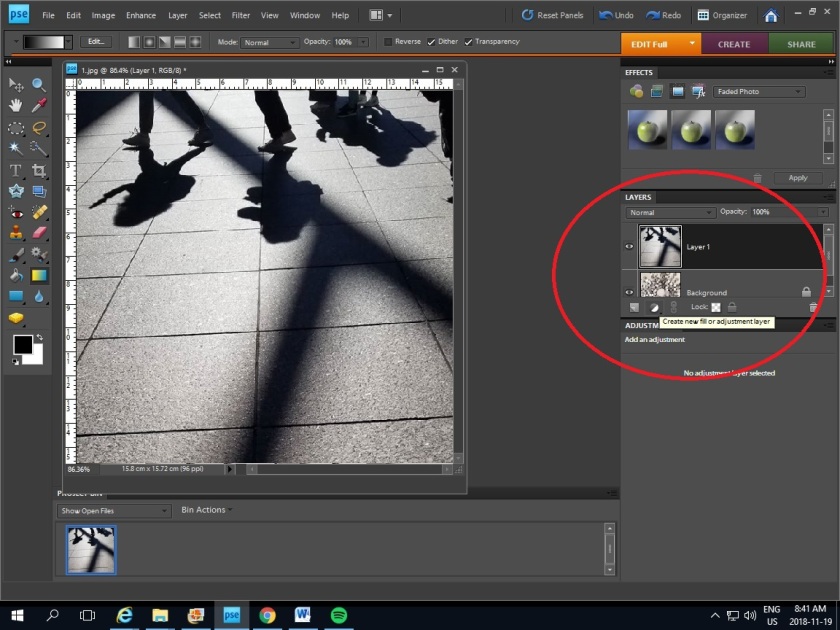
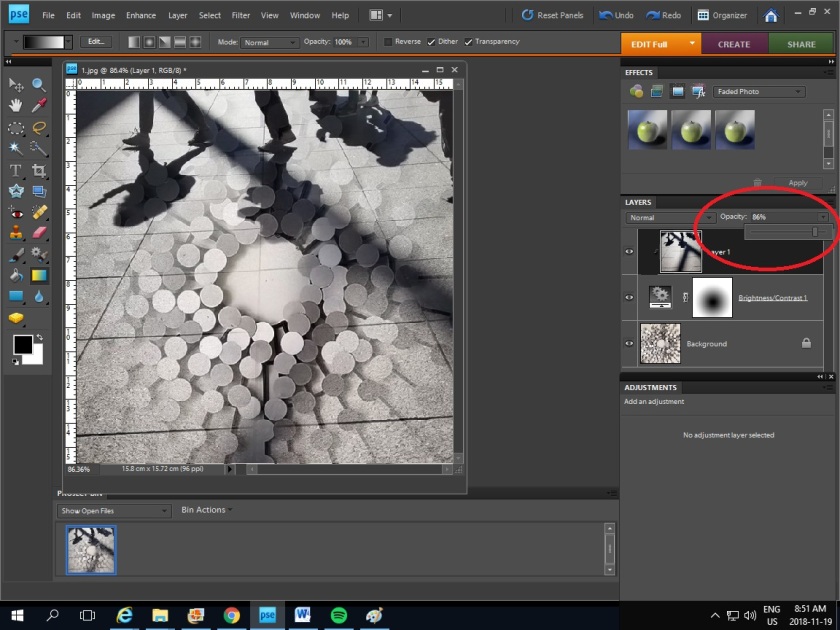
Merging two pictures to create a surreal image.
- Open two images in the same layers
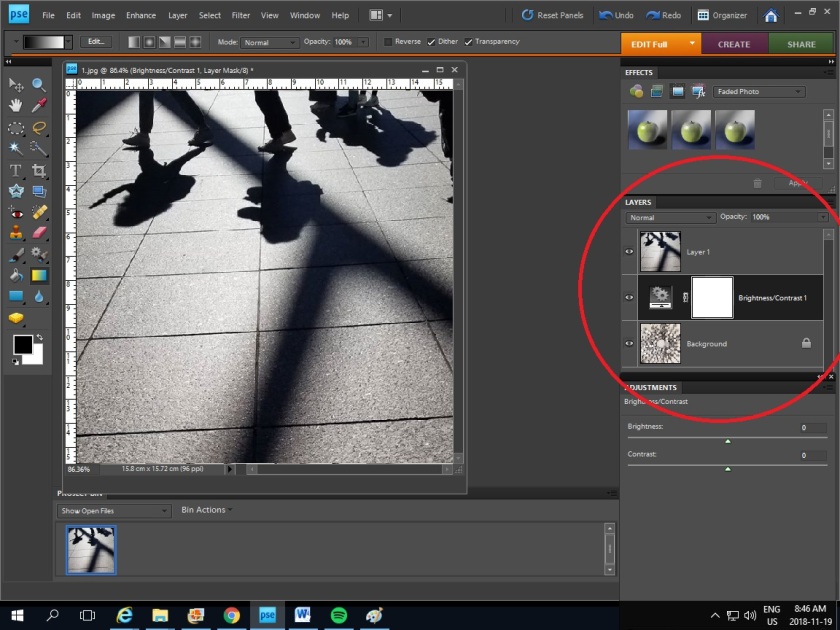
- Click Create new fill or adjustment layer and click Brightness/Contrast
3. Drag layer 1 above the new layer: Brightness/Contrast
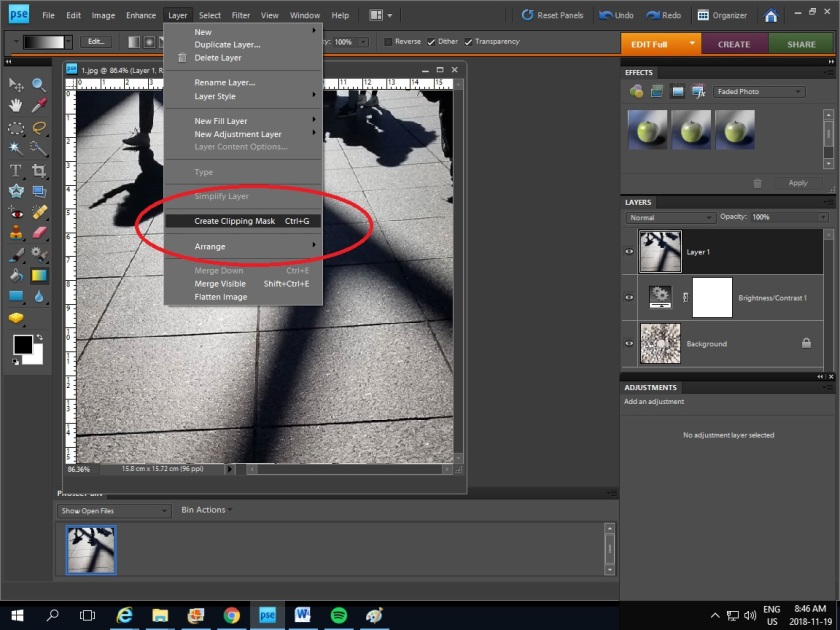
4. Click Layer 1 and click Create Clipping Mask under Layer
5. Click Gradient tool and drag lines on the picture to create an effect you like.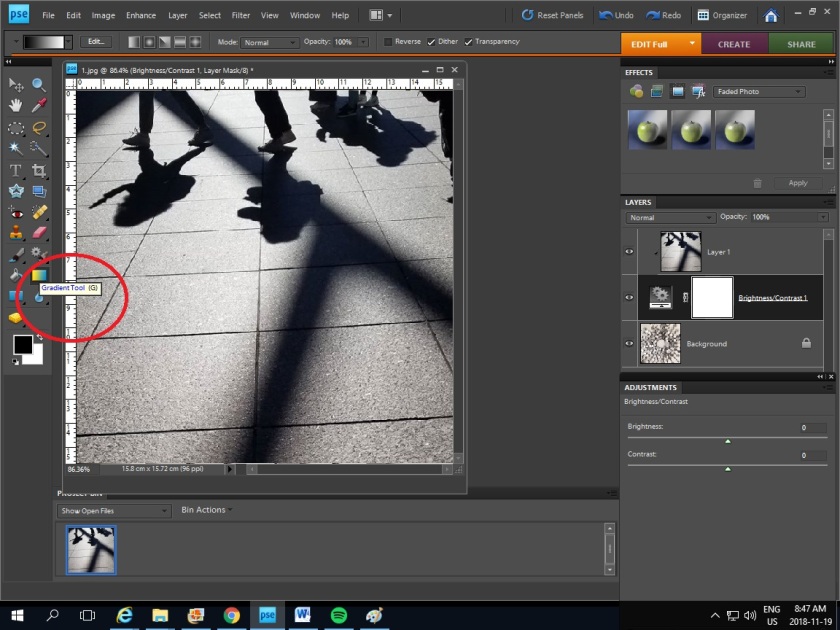
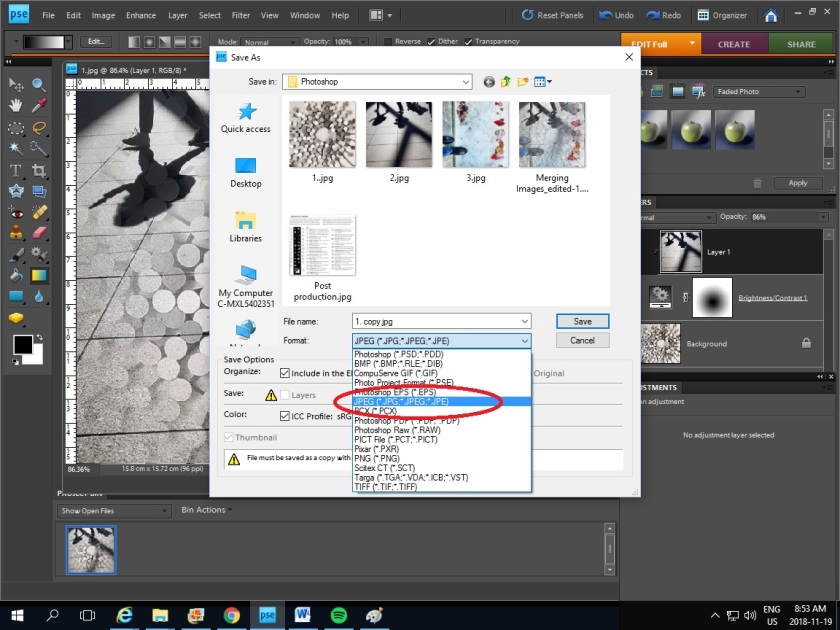
6. You can also adjust the Opacity of the image to create an interesting effect.
7. When you have the final image save the image in JPEG (Go to File > Save As > change the file format to JPEG) and upload the image to your blog.
Portrait Unit
Portraiture is perhaps the most popular, diverse, challenging and rewarding type of photography. You will embark on a portrait unit where you will be asked to photograph a variety of subjects in a variety of different environments to achieve a variety of different results. Through working out these challenges you will begin to develop a personal style and preference when it comes to portrait photography.
For this portrait unit, you will be required to fulfill the following requirements:
Assignment #1: Creative Portrait
Assignment #2: Portrait Photography Challenge
| Candid | Studio lighting | Portrait: Sitting in a Chair Either a formal sitting portrait or a re-interpretation of this classic. Photography your subject sitting in a chair. |
| Faceless portrait: create a portrait of someone without showing their face. | Hands and other details: Are there particular parts of their body or items of what they wear that are important to what they do for a living or a hobby? Does some part of them really stand out? Can you find a way to abstract what you want to say about the person by using one of these elements? | Use props to add an unexpected element to your portrait |
Assignment #3: Environmental portraits
Portraits are about people. Environmental portraits are about people and what they do with their lives. They are about the kind of house a person lives in and how they decorate it; about what kind of work they do and where they do it; about the surroundings they choose and the things they surround themselves with. Environmental portraits seek to convey an idea about a person by combining portraiture with a sense of place.
Order of Presentations
Order of Presentations for Monday, November 12
*THIS IS THE LAST DAY TO PRESENT.
- Ali
- Cairo
- Halima
- Bryan
- Munisah
- DJ
- Jade
- Sameen
_____________________________________
- Ava
- Mataasala
- Aniya
- Jenna
- Alice
- Aaliyah
- Aryana
- Shiaine
- Andy
- Adeeba
- Canaan
- Elle
- Layrone
- Qwanish
- Nicole
- Noah
Presentation Planning Sheet
After watching One Hour Photo…
The Social Media Effect: Are You Really Who You Portray Online?
“Family photos depict smiling faces. Births, wedding, holidays, children’s birthday parties. People take pictures of happy moments in their lives. Someone looking through our photo albums can conclude that we had led a joyous, leisurely existence. Free of tragedy. No one really takes a photography of something they want to forget” – from One Hour Photo
After watching One Hour Photo, write a paragraph reflecting about the role that photography plays in your own life. Are you really presenting who you are or are you presenting a hyper-idealistic version of yourself? It has been argued that the social media effect creates a false sense of self and self-esteem through the use of likes, fans, comments, posts, etc. As the use of social media continues to evolve; the concept of presenting our ideal selves versus our real selves has become more and more prevalent on social media platforms such as Facebook, Twitter, Instagram, Google+, Pinterest, and even LinkedIn. How do you use social media? How is social media revolutionizing photography?
Due: Friday, Oct.12th
